Tag

poptop

Browsing

Tools Needed:

Difficulty – 1.5/5

Time Needed – 2-4 Hours

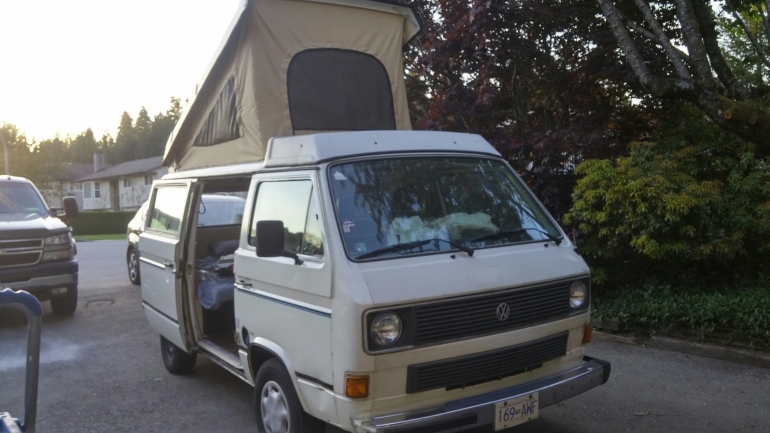
When we bought our Westfalia she was definitely showing her years, especially on her pop top ceiling. We discovered that it was a common problem among all these aging vehicles. Nearly everyone we’ve seen has a mould-covered canvas and ceiling. If you are going to spend any amount of time in your van you are going to want to remedy this issue. Mould can have serious negative effects on your health.Cleaner

First, we covered the entire floor and kitchen area with a tarp (or painter’s sheet) to ensure nothing dripped onto our carpets.

The ceiling will have a natural “fuzzy” feel to it. Volkswagen added flocking on to help insulate the bus – you’re going to want to try to preserve this!

We started scrubbing with just vinegar water but with little results. When this didn’t work we then turned to a more heavy-duty cleaner. We found a new to Canada product called Organic C-D at a 2:1 ratio (two parts organic CD to one part water). This is an environmentally friendly product that utilizes bacteria to fight dirt and, in our case, mould.

This worked to get most of the black mould off our roof but missed a few areas. The mixture we found worked the best was a combination of bleach and water. We heavily diluted the solution and only used it for areas that our second mixture couldn’t handle.

Don’t forget to check out how we find the best FREE campsites!

Be careful when using bleach. We strongly recommend waiting for a clear sunny day so you can open all of your windows, doors and hatch. The fumes can quickly build up, especially if you are doing this with your canvas still attached. It is not good to breathe these vapours and can harm your lungs. If you have construction masks you may want to use them.Scrub Brush

We had two spray bottles to test which concentrate worked better but quickly found that combining the two worked best.

Next, thoroughly soaked the roof in a spray of the Organic C-D mixture and bleach when needed.

The bleach will make your eyes sting a bit. Stick with it the results are amazing! After spraying both on we used our scrubbing brush (and some newfound muscles) to scrub the pop-top. Be careful not to use a too intense scrubbing brush that will chip away your flocking.

Be sure to avoid spraying your canvas with bleach – the stains on it would be awful! We found it best to break into sections then spray, scrub and then take a wet cloth to wipe away as much as you can. The corners are difficult – try using a toothbrush to get into them so you can be sure to kill all of the mould.

Please whatever you do, don’t just paint the ceiling white – This may sound like common sense but you wouldn’t believe how many Westys we have found that instead of cleaning their pop-top they simply spray painted their interior ceiling. This is horrible because it will just flake off which will still be toxic to you, not to mention it looks ugly.

Once you are finished, be sure to leave your windows open for at least a day to let it all ventilate so you aren’t left with a bleach sent!

Pro tip: if you’re changing out your canvas as well it will be MUCH easier to remove your old canvas and then clean the pop top. But make sure you clean it before installing the new one. This is a messy job and you don’t want to get your new canvas dirty or covered in bleach.

Let us know if you have any other tips or tricks to get this job done in the comments or if you have any photos, we love seeing them!

Happy cleaning 🙂

Tools Needed:

Difficulty – 4/5

Time Needed – 6-8 Hours

So you just bought, or are looking to buy, a Westy and it’s canvas pop top need to be replaced.
pop top, torn, poptop, canvas, westfalia

If you budget for a shop to replace it you could be facing upwards of hundreds of dollars just in labour. But you are an able-bodied, even handy person, looking to save money so you think you can replace it yourself. We thought the same. Here’s how we did it.

Before you start you’re going to want to see if you have a staple-in or screw-in top. Do this before you order your new one!!

We had a screw in one. With this setup, there are going to be metal rails that hold the top of the canvas to the roof and the bottom to the metal shell. To start you’re going to want to unscrew the rails. As you take the screws off you are going to want to see if they are intact.

One of the issues we had was that our screws were so corroded that they broke off as we tried to take them out. This left us with half screws clogging our passage.

You are going to want to mark or remember each hole that a screw broke off.

As you take off the metal rails mark them so you remember where they go. The straight ones go on top and the bent ones go on the bottom. It will help speed up the process if you know which go where.

Once you have the rails off the canvas will be stuck around the main bar that lifts your roof. We cut our canvas because it was beyond salvageable. You can unscrew the top of the bar and lift the top to get it out in one piece. But you want to do that as little as possible so you don’t mess with the seals around the screws. Nobody wants a leaky roof.

Once you have the canvas off you’re going to want to inspect the ceiling for mould and leaks.
image

Our ceiling had lots of mould and the skylight was cracked, which caused the mould. It took us hours of scrubbing, and a secret concoction we put together. You can find our secrets to cleaning the ceiling here.

The trick is to scrub the mould off without removing the fuzz that insulates the roof.

We used a wire toothbrush to get at the tough corners. You should check the seals around the edges to see if they are salvageable or should be replaced. This will help with leaks and moisture.
image

Once you have examined the shape of your top you can start installing your new canvas.

Before you bring it in the van, unfold your new canvas and lay it out. Take a second to admire it, after all, if you’re like us you spent a couple of hundred dollars on it!

Now, this is going to be painful, but fold it so you can find your centers at the front and the back. Nick them or draw on them at both the top and the bottom. This is going to be where you put your first screws in.

Now to reinstall

You’re going to have to unscrew the lifting bars attached to the top of the roof.

Note: make sure before you are putting the canvas through the bars that you put it on the right way. Sounds simple but we put ours upside down the first time.

We did this one at a time and lifted the roof just enough to slip the canvas over it. You’re going to want to be careful with the screws because they have small seals that are easily damaged, especially since your rig is pushing forty years.

Once you have the canvas around the bars you are going to want to line up your center marks with the front center screw hole of the top. We started on the top side. Grab your rail – you need to line the center rail up to the edge of the canvas and put one screw in to hold the canvas up.

We started with the center and worked our way out. Make sure it sits flush and you don’t have too much fabric pulled through. We put three screws in and moved on to the sides. We did the same with the sides. Started in the middle and put three screws in to hold it up.

We were concerned with the spacing and didn’t want to have too much or too little at the end. With each side we did, we stretched our canvas to the bottom to make sure that we screwed our canvas in with enough fabric left to properly reach the bottom. Don’t panic it’s supposed to be a tight fit. After all three sides were up we moved on to the back, working from the middle in the same way.

You want to put the screws just on the inside of the rubber strip at the end of the canvas. The bottom is done in the same way, but the corners require more attention. You will have to cut v-shaped notches in the bottom of the canvas to make it around the corner, just make sure you don’t cut into the threads.

The hardest part is the back of the van where the opening is the smallest and your space is limited. You’re going to have to use a small-sized screwdriver or ideally a flexible one if you can find it.

Installing the bottom is much the same, the difference being that you are going to need a second person to hold your pop-top at about a 3/4 popped up position to give you slack for working with. Check every couple screws to make sure you are leaving enough room to fully extend your pop-top.

image

Good luck! Any questions, post a comment and ask.

Disclosure: This post contains affiliate links which means we may get a commission if you make a purchase. Our opinions are our own and we only share what we believe you’ll find helpful. We also use all the products that we have links to. You can even see them in the photos we post.