Tag

vanagon

Browsing

Tools Needed:

Difficulty – 1.5/5

Time Needed – 2-4 Hours

When we bought our Westfalia she was definitely showing her years, especially on her pop top ceiling. We discovered that it was a common problem among all these aging vehicles. Nearly everyone we’ve seen has a mould-covered canvas and ceiling. If you are going to spend any amount of time in your van you are going to want to remedy this issue. Mould can have serious negative effects on your health.Cleaner
First, we covered the entire floor and kitchen area with a tarp (or painter’s sheet) to ensure nothing dripped onto our carpets.

The ceiling will have a natural “fuzzy” feel to it. Volkswagen added flocking on to help insulate the bus – you’re going to want to try to preserve this!

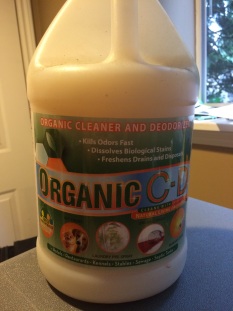
We started scrubbing with just vinegar water but with little results. When this didn’t work we then turned to a more heavy-duty cleaner. We found a new to Canada product called Organic C-D at a 2:1 ratio (two parts organic CD to one part water). This is an environmentally friendly product that utilizes bacteria to fight dirt and, in our case, mould.

This worked to get most of the black mould off our roof but missed a few areas. The mixture we found worked the best was a combination of bleach and water. We heavily diluted the solution and only used it for areas that our second mixture couldn’t handle.

Don’t forget to check out how we find the best FREE campsites!

Be careful when using bleach. We strongly recommend waiting for a clear sunny day so you can open all of your windows, doors and hatch. The fumes can quickly build up, especially if you are doing this with your canvas still attached. It is not good to breathe these vapours and can harm your lungs. If you have construction masks you may want to use them.Scrub Brush

We had two spray bottles to test which concentrate worked better but quickly found that combining the two worked best.

Next, thoroughly soaked the roof in a spray of the Organic C-D mixture and bleach when needed.

The bleach will make your eyes sting a bit. Stick with it the results are amazing! After spraying both on we used our scrubbing brush (and some newfound muscles) to scrub the pop-top. Be careful not to use a too intense scrubbing brush that will chip away your flocking.

Be sure to avoid spraying your canvas with bleach – the stains on it would be awful! We found it best to break into sections then spray, scrub and then take a wet cloth to wipe away as much as you can. The corners are difficult – try using a toothbrush to get into them so you can be sure to kill all of the mould.

Please whatever you do, don’t just paint the ceiling white – This may sound like common sense but you wouldn’t believe how many Westys we have found that instead of cleaning their pop-top they simply spray painted their interior ceiling. This is horrible because it will just flake off which will still be toxic to you, not to mention it looks ugly.

Once you are finished, be sure to leave your windows open for at least a day to let it all ventilate so you aren’t left with a bleach sent!

Pro tip: if you’re changing out your canvas as well it will be MUCH easier to remove your old canvas and then clean the pop top. But make sure you clean it before installing the new one. This is a messy job and you don’t want to get your new canvas dirty or covered in bleach.

Let us know if you have any other tips or tricks to get this job done in the comments or if you have any photos, we love seeing them!

Happy cleaning 🙂

Tools Needed:

Difficulty – 4/5

Time Needed – 6-8 Hours

So you just bought, or are looking to buy, a Westy and it’s canvas pop top need to be replaced.
pop top, torn, poptop, canvas, westfalia

If you budget for a shop to replace it you could be facing upwards of hundreds of dollars just in labour. But you are an able-bodied, even handy person, looking to save money so you think you can replace it yourself. We thought the same. Here’s how we did it.

Before you start you’re going to want to see if you have a staple-in or screw-in top. Do this before you order your new one!!

We had a screw in one. With this setup, there are going to be metal rails that hold the top of the canvas to the roof and the bottom to the metal shell. To start you’re going to want to unscrew the rails. As you take the screws off you are going to want to see if they are intact.

One of the issues we had was that our screws were so corroded that they broke off as we tried to take them out. This left us with half screws clogging our passage.

You are going to want to mark or remember each hole that a screw broke off.

As you take off the metal rails mark them so you remember where they go. The straight ones go on top and the bent ones go on the bottom. It will help speed up the process if you know which go where.

Once you have the rails off the canvas will be stuck around the main bar that lifts your roof. We cut our canvas because it was beyond salvageable. You can unscrew the top of the bar and lift the top to get it out in one piece. But you want to do that as little as possible so you don’t mess with the seals around the screws. Nobody wants a leaky roof.

Once you have the canvas off you’re going to want to inspect the ceiling for mould and leaks.
image

Our ceiling had lots of mould and the skylight was cracked, which caused the mould. It took us hours of scrubbing, and a secret concoction we put together. You can find our secrets to cleaning the ceiling here.

The trick is to scrub the mould off without removing the fuzz that insulates the roof.

We used a wire toothbrush to get at the tough corners. You should check the seals around the edges to see if they are salvageable or should be replaced. This will help with leaks and moisture.
image

Once you have examined the shape of your top you can start installing your new canvas.

Before you bring it in the van, unfold your new canvas and lay it out. Take a second to admire it, after all, if you’re like us you spent a couple of hundred dollars on it!

Now, this is going to be painful, but fold it so you can find your centers at the front and the back. Nick them or draw on them at both the top and the bottom. This is going to be where you put your first screws in.

Now to reinstall

You’re going to have to unscrew the lifting bars attached to the top of the roof.

Note: make sure before you are putting the canvas through the bars that you put it on the right way. Sounds simple but we put ours upside down the first time.

We did this one at a time and lifted the roof just enough to slip the canvas over it. You’re going to want to be careful with the screws because they have small seals that are easily damaged, especially since your rig is pushing forty years.

Once you have the canvas around the bars you are going to want to line up your center marks with the front center screw hole of the top. We started on the top side. Grab your rail – you need to line the center rail up to the edge of the canvas and put one screw in to hold the canvas up.

We started with the center and worked our way out. Make sure it sits flush and you don’t have too much fabric pulled through. We put three screws in and moved on to the sides. We did the same with the sides. Started in the middle and put three screws in to hold it up.

We were concerned with the spacing and didn’t want to have too much or too little at the end. With each side we did, we stretched our canvas to the bottom to make sure that we screwed our canvas in with enough fabric left to properly reach the bottom. Don’t panic it’s supposed to be a tight fit. After all three sides were up we moved on to the back, working from the middle in the same way.

You want to put the screws just on the inside of the rubber strip at the end of the canvas. The bottom is done in the same way, but the corners require more attention. You will have to cut v-shaped notches in the bottom of the canvas to make it around the corner, just make sure you don’t cut into the threads.

The hardest part is the back of the van where the opening is the smallest and your space is limited. You’re going to have to use a small-sized screwdriver or ideally a flexible one if you can find it.

Installing the bottom is much the same, the difference being that you are going to need a second person to hold your pop-top at about a 3/4 popped up position to give you slack for working with. Check every couple screws to make sure you are leaving enough room to fully extend your pop-top.

image

Good luck! Any questions, post a comment and ask.

Disclosure: This post contains affiliate links which means we may get a commission if you make a purchase. Our opinions are our own and we only share what we believe you’ll find helpful. We also use all the products that we have links to. You can even see them in the photos we post.

When we found Gurt she was a wee bit eager to start. We found her with a dead battery, so we replaced it. But as soon as we connected the battery, much to our surprise, she would start to turn over without the keys even close to the ignition. When we would put the keys in the ignition, turn it to the “on” position and give her some gas she would turn on. We found her after not being on the road for 8 years, so her even turning over was a good sign for us.

After seeking help on forums, calls to automotive repair shops we decided to start by change the starter. This is not the hardest job, but there are a few tricks that will definitely slow you down if you know them.

Tools Needed:

Difficulty – 3.5/5

Time Needed – 1.25 Hours

Click here to find out how to change your Vanagon’s Fuel Pump

image You’re going to want to start by looking over the starter. We did this by jacking up our rig. We backed it up to a high point with the engine bay overhanging. With our van jacked up we crawled under. Looking at the bottom of the engine by the transmission you will see the starter. It’s a little hard to access, but it looks like the picture below. There will be a bolt on the bottom of the starter, and a 16 mm wrench will be needed to unscrew it. It will be a small one, about an inch long.

Next, you’re going to want to look at the top of the starter from the back of the van through the hatch. You will just be able to see it – this is the bolt that you’re going to need the 8 mm Allen wrench to unscrew. We did this with me under the van and Samara laying in the van with the Z-seat folded down. I guided her to the bolt with my hand.

This is when you’re first analysis is going to come in handy. If it looks like your starter is from the factory you’re going to need some WD40. This bolt is long – around 6-8 inches long. And the part that we didn’t know is that there is a nut on the end of it. We spent an embarrassingly long time spinning the Allen key not knowing why it wasn’t loosening. Another thing to keep in mind is that there are spaces where the transmission joins the engine. I found it hard to keep my hand on the nut when taking it off and replacing it, making extra sure that it didn’t fall into the crevasses. Also, you’re going to want to be careful not to snap this bolt. Ours was very rusty in the middle and took a little finessing to break free.

Once both bolts are taken off, the starter should pull out. Make sure that you don’t bend it as it’s taken out, which is easier said than done with the long bolt in your way. Also, be careful of the wiring. On the right side (looking from the bottom facing the rear) there are going to be two wires attached to the prongs on the starter. These are for the starter ignition. It is worth noting that our Westfalia is an automatic (the wiring could be different for a manual). Take note of the placement of the wiring. They should go back on the same way they came off.image

Replacing The Starter

Once the starter is out it is literally the reverse of how it came out. I found that balancing the new starter on my chest as I plugged the wires in worked well. You’re also going to want to put the long bolt in before you hoist it into place. Now you are ready to put the starter back in. Just like taking it out, put it in straight and flush it up. I found it easiest to hold the starter with my right hand as my hand tightened the small screw at the bottom with my left hand. Then I put the long bolt in and put the washer on and tightened the nut at the back, again being careful not to drop the nut into the transmission.

Now you are ready to try to crank over the engine! Good luck and let us know how this went for you.

About two weeks into vanlife we met a couple sitting by the fire we just made on the beach in Tofino. Watching the waves they asked us if our way of life made us feel more back to our roots. “Is a fire just a fire or does it hold more meaning to you now?”

I didn’t know how to answer this. What did he mean? It’s a fire. We make it to roast marshmellows and to increase the atmosphere while sitting on the beach. More than a year later and I wish I could go back and re answer this question.

Fire to me back then was a mere means to get warm. But after a year of living with almost everything in our life requiring a sort of “work” my generation isn’t used to I see it completely differently.

Doing dishes doesn’t simply involved loading your dishes into the dishwasher and pushing start. I remember living life before putting dishes in the sink thinking opening the dishwasher and finding a place for it was more effort than I needed to put in.

Our tiny home requires constant order. It is very easy to get this place messy so it is best to do dishes right after you use them. With no dishwasher this chore now requires me to walk to the river and fill a bucket with 4 liters of water. Dividing the water among the day we set forth to do dishes placing a towel on the ground so the sun can dry them.

As the water we use ends up in the earth we all live from, we spend a bit more to buy fully biodegradable soap. With multi functions, we use this soap for everything from dishes to laundry to a body wash (it is magic).

Our 4 liters of water is used to clean almost every dish in our house, as well as all our laundry for the week. A typical dishwasher uses about 23 liters of water and a washing machine a whopping 50 (and that’s the new energy efficient ones). This doesn’t account for all the energy used to run them.

Something else changed though, this no longer seems like a chore that is not worth our time. Learning how to work together, Myles cooks and I do dishes and he puts them away. I wash laundry and he hangs the line and the clothes. We got into our respective routines quite quickly. A step back in time, we even use matches to start our propane stove instead of a simple lighter.
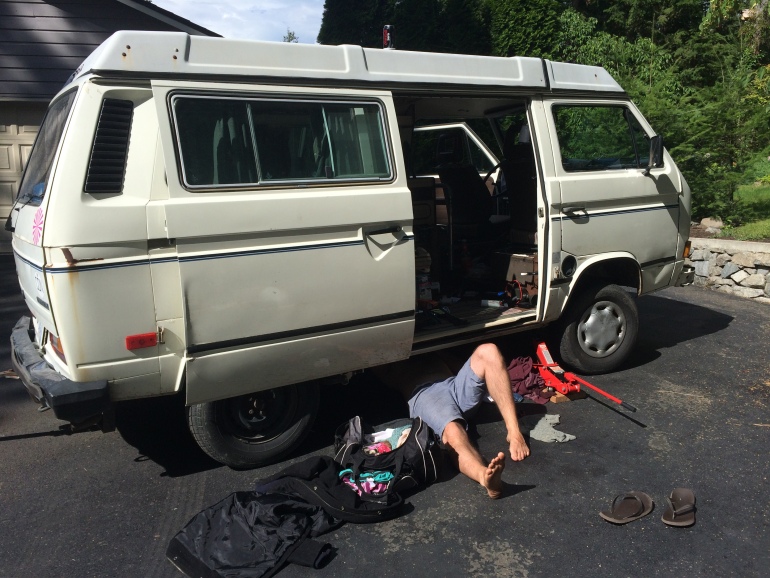
It doesn’t feel like a chore anymore, instead just a part of our life. With so much time, we aren’t too rushed to do the things we need to do. We have the time to experiment with meals, we have the time to shop at different grocery stores to find all the products we need.

It took us almost a year to figure out, but we have officially slowed down all the way back to the 20th century. If I were asked the same question I was a year ago, my answer would be drastically different. Fire is a way of warmth. It is something that is more than the sum of the parts. It is still a method of warmth and is used to roast marshmellows, but there is something more, a feeling that comes along with it.

So your van is making a loud humming noise and you’re wondering what it is. She’s also having trouble (more than usual) accelerating up hills. It might be time to check your fuel pump and filter.

Tools Needed:

  • Difficulty – 3/5

    Time Needed – 20 minutes

    It goes without saying this is going to be a messy job. No matter how you spin it you are going to get fuel on you, at least from my experience. Wear clothes that you are willing to never wear again. You are going to want to start by gathering all of the equipment you’re going to need. Obviously, once you start you are not going to be able to drive anywhere.

    IMG_2787

    As you may know, we have a 1984 Volkswagen Vanagon. Our particular model has a metal shroud protecting the engine (essentially a metal plate). It’s held on by a dozen or so screws and you won’t be able to do anything with it on.

    Start by clamping. You’re going to have to decide if you want to change both the fuel pump and filter. You’re clamp location is dependent on this. If you’re going to do both, you are going to put a clamp just past the fuel pump closest to the engine, and one on the line on the fuel tank side of the fuel filter.

    Our van has a 10mm bolt that secures the fuel pump to the frame of the van. Remove this and take the pump out of the holder. Once you have your clamps set up it is time to test them. I did this by slowly backing off the clamps for the fuel filter. You will know quickly if your clamps are tight enough. If fuel is not flowing out your clamp is ready. Some books say to start your engine while the clamps are on to use up the fuel in the lines. I have tried with and without doing this – it works way better to use op the fuel. Needless to say, there is going to be extra fuel if you don’t.

    Once you have your clamps set it is a matter of undoing the clasps that secure your pump and filter, removing the old fuel pump and filter and replacing them with the new ones. Please, please, please make sure you look at the little arrow on the fuel pump and filter. It tells you which way the fuel flows. Make sure that the arrow is pointing towards the engine. I’m not sure what happens if you don’t aim it the right way, but it can’t be good.

    So you have the little arrows pointing the right way (towards the engine) and have put the fuel pump and filter back together. The clasps that secure the pump and filter should be snug but not too tight. I test this by tightening them to where I think is good and trying to pull the lines off (not too hard though).

    Now comes the moment of truth. Time to take your clamps off and see if you have any leaks. Same as when you put them on, start with the clamp closest to the fuel tank. Slowly release the clamp while looking for leaks around the newly replaced fuel filter and pump.

    If the fuel holds you are ready to start your van and test your work. Keep in mind that it might take a few cranks to get it working since your fuel pump hasn’t had fuel flowing through it yet.

    Good luck. If you need any help just leave a comment!

All vehicles break down and eventually need repair. This is especially true when you drive a 33 year old Volkswagen van. When you add that most mechanics in Canada and the USA haven’t ever worked on these vehicles, let alone have metric tools, you start to become self-reliant.

Even small jobs like oil changes are unique when the technician goes to open the hood only to find no engine. Larger jobs like changing fuel pumps or electrical issues become more of a challenge and require you to know even more. Rest assured the learning curve is steep but diagnosing, and fixing your car is one of the most rewarding feelings.

We’re not mechanics. Neither of us have any formal automotive training, but what we lack in knowledge we make up with a frugal mindset (read: Cheap), willingness to learn, and we don’t go anywhere if we don’t fix it.

IMG_4412.JPG After an intense love affair with Colorado (for anyone who hasn’t gone, go and allow yourself at least double the time you intend to stay there, it is AMAZING), Myles and I headed north toward Wyoming. We were told by quite a few people that Wyoming was home to some of the most beautiful and ever changing scenery. After crossing the border and instantly finding some hot springs, a new found favourite activity of ours, we were very happy to be there.

After driving through Wyoming we stumbled upon this lonely Syncro wasting away. Our undying love for these vans got the better of us and less than twenty four hours later we found ourselves with the keys in our hands and a forty-eight hour permit to leave the country.

Scroll through your Netflix and you will quickly be able to find dozens of documentaries on food and what it’s doing to our bodies. From GMOs, becoming vegan, juicing, and high sugar consumption, there are plenty of people out there that have dsc_0613 found that changing a little bit can make a huge difference. I am the first to admit I have lived (and still live) by them all. I’ve cut the sugar, stopped eating animals, have owned a juicer (really expensive – I would way rather eat my fruits and veggies) and really try to stick to non-steroid induced foods (ha-in our society!).
“You look healthy and happy.” You’ve heard those two coinciding, but I thought once you became healthy, you became happy. I never realized that once you became happy, truly happy, your health will sky rocket. I have heard of stress playing a big part in your life and even though I felt stress, I always convinced myself that other people had it worse.

Convinced my “stresses” didn’t matter, I was addicted to telling myself the amount of my stress was ridiculous. Since leaving for a life on the road I haven’t tried to be happy. I haven’t actively thought to myself about how unhappy I am and how I need to be happier and have more fun. Sure, I have become a far more healthy person but I haven’t actively thought “you need to eat this way or you will get fat” like so many diets tell you to. I have never seen a documentary about freedom causing your health to increase, so that couldn’t be whats happening.

As you may know, shortly before leaving I injured my leg – over and over again. After an initial knee injury left me almost immobile, I injured my ankle. Yep, same leg. I couldn’t kneel or squat and lost a lot of muscle in my leg and gained quite a bit of weight. I wasn’t healthy. You wouldn’t believe it but when telling people about my injury, I had a few people quickly respond img_2730 with, “Oh no, how are you going to work?” That was probably my rock bottom, my hate all with society, my burning desire to make a change – a big change.

After two and a half months on this trip I can now not only walk, I can hike. I can not only squat (still struggle a bit) but I can kneel on my paddle board. I can sit with my legs crossed again, I can even straighten my leg fully. This may seem common, after all I am only twenty-four, but let me tell you only eight short weeks ago I could not do any of this.

What have I done differently you ask? Well, that is a matter of opinion. It may just be time naturally healing (doubtful as my injury occurred late February, a sudden drastic improvement four months later seems unlikely) but in my opinion I no longer obsess with getting better. No longer do I spend every waking moment petrified that my knee isn’t getting better and if it doesn’t get better quick, good-bye future. If you ask Myles, it is that I have a reason to get better. I want to hike the mountains, I want to go paddle boarding. It is a much better motivation than getting better so I can go back to a job.

Not convinced yet? Well, hear this one. Before I left I was diagnosed with having gall stones. The attacks are unlike any pain you have ever felt. My mom, a woman who has given birth three times, compares the pain to that of labor. I honestly wasn’t img_4080 surprised by this as everyone in my family has had issues with their gall bladder and has gotten theirs removed.

In a span of three months I had about ten attacks. Curling over with the most crippling pain I have ever felt and absolutely nothing I do helping even a little. Some landing me in the hospital with IV drips and promises of upcoming surgery to remove this little nuisance. I am proud, and incredibly surprised, to report that I haven’t gotten an attack since the second week of being gone. I am now having to tell my doctor to cancel the surgery. Turns out I didn’t need a knife to solve this problem.

Last one (sorry boys, this one might be a little too much for you), about a year and a half ago I was diagnosed with Polycystic Ovary Syndrome. Basically, I stopped getting my period every month; my hormones were going more than normal. I was being told that it will more than likely be incredibly difficult for me to conceive (well, actually I was at a horrible walk-in that rather than sugar coating it, directly said that I will not be having children).

I was distraught so I went to gynecologists who sent me for blood work and told me that the goal was for me to get my periods back. Well this is only a start but in the almost three months I have been gone I have successfully gotten mine twice. Believe what you may but yet another victory for me (I am probably one of very few women who would get excited about this).

Writing them all here, I am actually shocked to see in black and white how unhealthy I was. At the time I never realized how bad I really was. It wasn’t until a couple of nights ago when talking to Myles that I realized how much healthier I have become. You can decide for yourself, it may truly be all coincidental, but whatever it is I’ll take it! Happy makes you healthy… huh, well that’s good to learn!

Let us know what you think and how you stay healthy!

When we started this trip we had an idea of what it was going to be like. As much as we tried to do this without expectation and without any planning, nature set in and we couldn’t help but dream about our freedom. But, as always, reality is different. When we started this life, we were much like children at recess, running in circles basking in our new found freedom. We are now more like children after school – still running around hyped on sugar, but we know we have a little more time than the 15 minutes now.

In two months of Vanlife we have only paid to sleep once (I am writing this from an air-conditioned room in Saint Catharines, Ontario). We have slept everywhere from the mountains outside Lillooet to a department store’s parking lot in Wisconsin.

DSC_0528

Six months ago Myles and I were sitting in our basement suite both injured and both extremely unhappy. Our injuries, although very different from one another, left us feeling in very similar ways. We were too young to feel like this, we felt bed ridden. Blinded with self pity we hardly ventured outside, we barely did anything. With no plans for a future, we certainly didn’t think anything positive.

In the past two months, we have traveled across five provinces and driven through eight states. Seen everything from frogs and vultures to bear cubs and elk, climbed up mountains, swam in lakes and got lost in the forests (more times than we care to admit). We’ve been euphoric, humbled, even scared. We have stopped in the most incredible cities, and some we wish we didn’t (a wrong turn just before getting into Colorado combined with a car that wouldn’t run turned a lot of heads and left us more than a little nervous). We’ve broken Gurt, and then fixed her more times than we can count.