Tag

Volkswagen

Browsing

Tools Needed:

Difficulty – 1.5/5

Time Needed – 2-4 Hours

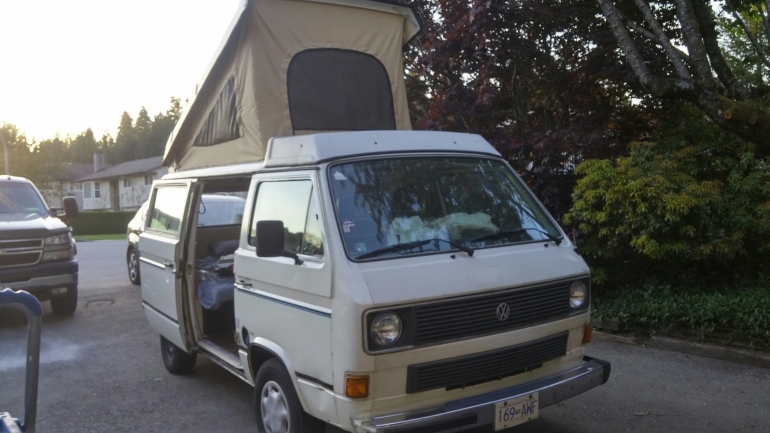
When we bought our Westfalia she was definitely showing her years, especially on her pop top ceiling. We discovered that it was a common problem among all these aging vehicles. Nearly everyone we’ve seen has a mould-covered canvas and ceiling. If you are going to spend any amount of time in your van you are going to want to remedy this issue. Mould can have serious negative effects on your health.Cleaner
First, we covered the entire floor and kitchen area with a tarp (or painter’s sheet) to ensure nothing dripped onto our carpets.

The ceiling will have a natural “fuzzy” feel to it. Volkswagen added flocking on to help insulate the bus – you’re going to want to try to preserve this!

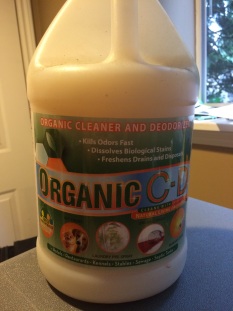
We started scrubbing with just vinegar water but with little results. When this didn’t work we then turned to a more heavy-duty cleaner. We found a new to Canada product called Organic C-D at a 2:1 ratio (two parts organic CD to one part water). This is an environmentally friendly product that utilizes bacteria to fight dirt and, in our case, mould.

This worked to get most of the black mould off our roof but missed a few areas. The mixture we found worked the best was a combination of bleach and water. We heavily diluted the solution and only used it for areas that our second mixture couldn’t handle.

Don’t forget to check out how we find the best FREE campsites!

Be careful when using bleach. We strongly recommend waiting for a clear sunny day so you can open all of your windows, doors and hatch. The fumes can quickly build up, especially if you are doing this with your canvas still attached. It is not good to breathe these vapours and can harm your lungs. If you have construction masks you may want to use them.Scrub Brush

We had two spray bottles to test which concentrate worked better but quickly found that combining the two worked best.

Next, thoroughly soaked the roof in a spray of the Organic C-D mixture and bleach when needed.

The bleach will make your eyes sting a bit. Stick with it the results are amazing! After spraying both on we used our scrubbing brush (and some newfound muscles) to scrub the pop-top. Be careful not to use a too intense scrubbing brush that will chip away your flocking.

Be sure to avoid spraying your canvas with bleach – the stains on it would be awful! We found it best to break into sections then spray, scrub and then take a wet cloth to wipe away as much as you can. The corners are difficult – try using a toothbrush to get into them so you can be sure to kill all of the mould.

Please whatever you do, don’t just paint the ceiling white – This may sound like common sense but you wouldn’t believe how many Westys we have found that instead of cleaning their pop-top they simply spray painted their interior ceiling. This is horrible because it will just flake off which will still be toxic to you, not to mention it looks ugly.

Once you are finished, be sure to leave your windows open for at least a day to let it all ventilate so you aren’t left with a bleach sent!

Pro tip: if you’re changing out your canvas as well it will be MUCH easier to remove your old canvas and then clean the pop top. But make sure you clean it before installing the new one. This is a messy job and you don’t want to get your new canvas dirty or covered in bleach.

Let us know if you have any other tips or tricks to get this job done in the comments or if you have any photos, we love seeing them!

Happy cleaning 🙂

Tools Needed:

Difficulty – 4/5

Time Needed – 6-8 Hours

So you just bought, or are looking to buy, a Westy and it’s canvas pop top need to be replaced.
pop top, torn, poptop, canvas, westfalia

If you budget for a shop to replace it you could be facing upwards of hundreds of dollars just in labour. But you are an able-bodied, even handy person, looking to save money so you think you can replace it yourself. We thought the same. Here’s how we did it.

Before you start you’re going to want to see if you have a staple-in or screw-in top. Do this before you order your new one!!

We had a screw in one. With this setup, there are going to be metal rails that hold the top of the canvas to the roof and the bottom to the metal shell. To start you’re going to want to unscrew the rails. As you take the screws off you are going to want to see if they are intact.

One of the issues we had was that our screws were so corroded that they broke off as we tried to take them out. This left us with half screws clogging our passage.

You are going to want to mark or remember each hole that a screw broke off.

As you take off the metal rails mark them so you remember where they go. The straight ones go on top and the bent ones go on the bottom. It will help speed up the process if you know which go where.

Once you have the rails off the canvas will be stuck around the main bar that lifts your roof. We cut our canvas because it was beyond salvageable. You can unscrew the top of the bar and lift the top to get it out in one piece. But you want to do that as little as possible so you don’t mess with the seals around the screws. Nobody wants a leaky roof.

Once you have the canvas off you’re going to want to inspect the ceiling for mould and leaks.
image

Our ceiling had lots of mould and the skylight was cracked, which caused the mould. It took us hours of scrubbing, and a secret concoction we put together. You can find our secrets to cleaning the ceiling here.

The trick is to scrub the mould off without removing the fuzz that insulates the roof.

We used a wire toothbrush to get at the tough corners. You should check the seals around the edges to see if they are salvageable or should be replaced. This will help with leaks and moisture.
image

Once you have examined the shape of your top you can start installing your new canvas.

Before you bring it in the van, unfold your new canvas and lay it out. Take a second to admire it, after all, if you’re like us you spent a couple of hundred dollars on it!

Now, this is going to be painful, but fold it so you can find your centers at the front and the back. Nick them or draw on them at both the top and the bottom. This is going to be where you put your first screws in.

Now to reinstall

You’re going to have to unscrew the lifting bars attached to the top of the roof.

Note: make sure before you are putting the canvas through the bars that you put it on the right way. Sounds simple but we put ours upside down the first time.

We did this one at a time and lifted the roof just enough to slip the canvas over it. You’re going to want to be careful with the screws because they have small seals that are easily damaged, especially since your rig is pushing forty years.

Once you have the canvas around the bars you are going to want to line up your center marks with the front center screw hole of the top. We started on the top side. Grab your rail – you need to line the center rail up to the edge of the canvas and put one screw in to hold the canvas up.

We started with the center and worked our way out. Make sure it sits flush and you don’t have too much fabric pulled through. We put three screws in and moved on to the sides. We did the same with the sides. Started in the middle and put three screws in to hold it up.

We were concerned with the spacing and didn’t want to have too much or too little at the end. With each side we did, we stretched our canvas to the bottom to make sure that we screwed our canvas in with enough fabric left to properly reach the bottom. Don’t panic it’s supposed to be a tight fit. After all three sides were up we moved on to the back, working from the middle in the same way.

You want to put the screws just on the inside of the rubber strip at the end of the canvas. The bottom is done in the same way, but the corners require more attention. You will have to cut v-shaped notches in the bottom of the canvas to make it around the corner, just make sure you don’t cut into the threads.

The hardest part is the back of the van where the opening is the smallest and your space is limited. You’re going to have to use a small-sized screwdriver or ideally a flexible one if you can find it.

Installing the bottom is much the same, the difference being that you are going to need a second person to hold your pop-top at about a 3/4 popped up position to give you slack for working with. Check every couple screws to make sure you are leaving enough room to fully extend your pop-top.

image

Good luck! Any questions, post a comment and ask.

Disclosure: This post contains affiliate links which means we may get a commission if you make a purchase. Our opinions are our own and we only share what we believe you’ll find helpful. We also use all the products that we have links to. You can even see them in the photos we post.

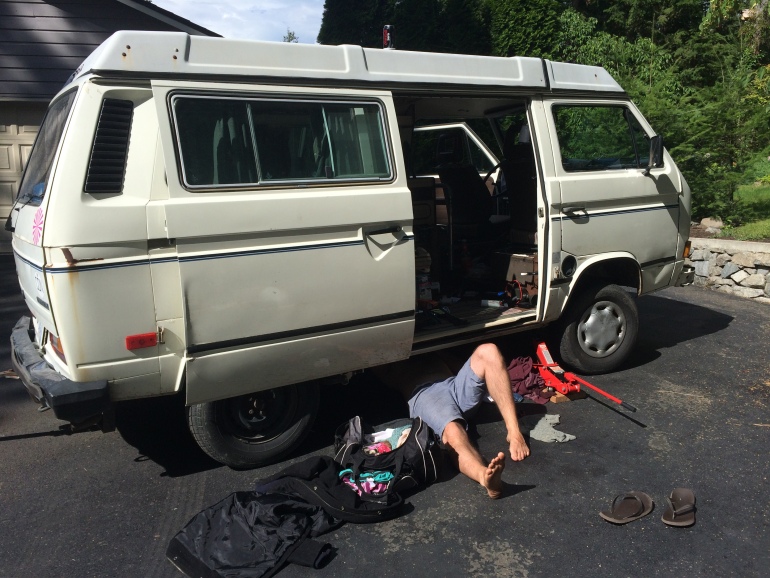
When we found Gurt she was a wee bit eager to start. We found her with a dead battery, so we replaced it. But as soon as we connected the battery, much to our surprise, she would start to turn over without the keys even close to the ignition. When we would put the keys in the ignition, turn it to the “on” position and give her some gas she would turn on. We found her after not being on the road for 8 years, so her even turning over was a good sign for us.

After seeking help on forums, calls to automotive repair shops we decided to start by change the starter. This is not the hardest job, but there are a few tricks that will definitely slow you down if you know them.

Tools Needed:

Difficulty – 3.5/5

Time Needed – 1.25 Hours

Click here to find out how to change your Vanagon’s Fuel Pump

image You’re going to want to start by looking over the starter. We did this by jacking up our rig. We backed it up to a high point with the engine bay overhanging. With our van jacked up we crawled under. Looking at the bottom of the engine by the transmission you will see the starter. It’s a little hard to access, but it looks like the picture below. There will be a bolt on the bottom of the starter, and a 16 mm wrench will be needed to unscrew it. It will be a small one, about an inch long.

Next, you’re going to want to look at the top of the starter from the back of the van through the hatch. You will just be able to see it – this is the bolt that you’re going to need the 8 mm Allen wrench to unscrew. We did this with me under the van and Samara laying in the van with the Z-seat folded down. I guided her to the bolt with my hand.

This is when you’re first analysis is going to come in handy. If it looks like your starter is from the factory you’re going to need some WD40. This bolt is long – around 6-8 inches long. And the part that we didn’t know is that there is a nut on the end of it. We spent an embarrassingly long time spinning the Allen key not knowing why it wasn’t loosening. Another thing to keep in mind is that there are spaces where the transmission joins the engine. I found it hard to keep my hand on the nut when taking it off and replacing it, making extra sure that it didn’t fall into the crevasses. Also, you’re going to want to be careful not to snap this bolt. Ours was very rusty in the middle and took a little finessing to break free.

Once both bolts are taken off, the starter should pull out. Make sure that you don’t bend it as it’s taken out, which is easier said than done with the long bolt in your way. Also, be careful of the wiring. On the right side (looking from the bottom facing the rear) there are going to be two wires attached to the prongs on the starter. These are for the starter ignition. It is worth noting that our Westfalia is an automatic (the wiring could be different for a manual). Take note of the placement of the wiring. They should go back on the same way they came off.image

Replacing The Starter

Once the starter is out it is literally the reverse of how it came out. I found that balancing the new starter on my chest as I plugged the wires in worked well. You’re also going to want to put the long bolt in before you hoist it into place. Now you are ready to put the starter back in. Just like taking it out, put it in straight and flush it up. I found it easiest to hold the starter with my right hand as my hand tightened the small screw at the bottom with my left hand. Then I put the long bolt in and put the washer on and tightened the nut at the back, again being careful not to drop the nut into the transmission.

Now you are ready to try to crank over the engine! Good luck and let us know how this went for you.

After living a life on the road for around 3 years, we now consider ourselves experts in finding the best free campground. If you add the fact that we have only paid for about 4 nights of accommodation – boondocking is our specialty. There are many aspects you should factor into your decision about where you should spend your time in the woods.

Whether you are looking for a new unplugged experience, or just want to find some of the most secluded campgrounds, going off the beaten path works wonders for your mental health. Since we travel with dogs we prefer public sites rather than private ones where we don’t have to keep them leashed all the time. We have been asked so many times how we find the sites we stay at so we thought we’d let you all in on all of our secrets.

This is for weekend warriors and Vanlifers alike. No matter where in North America you are these tips will help you find the best campground near you. Some places are going to be easier to camp in than others. Depending on where you are going, there are certain things you should know.

Not in North America? Check with local bylaws for rules on camping. When we were road tripping through Scotland they have a freedom to roam act that allows you to camp on any public land.

Free Sites

There are tons of land that you can camp on for FREE in North America. If you are in Canada most “Crown land” is free to camp on as well as any forest service roads. For example, 94% of land in British Columbia is considered Crown Land. This means the government owns the land. The USA has a similar thing called BLM land. This is land that isn’t owned by a single person. It is owned by the government, considered public land, and is free to use.

Not all maps will show you where this is or how to get to it, but trust us it is some of the best land to camp on. Some of this land is simply that, bare land that you can set up a tent or park your van on. The cool thing about this land is that you will find campgrounds that have everything provincial, or state, parks have. This can include picnic tables, fire pits and even outhouses. Don’t expect electricity or running water though.

* A few things to consider:

  • Do your research to see if there are any fire restrictions in your area. If there are you can be fined for starting a fire. It is your responsibility to find this out. This is especially true in Canada where there are fire restrictions every single summer in most places.

  • For both Canada and the USA, there is usually a stay limit, typically around 14-21 days. This, at least in our experience, isn’t strongly enforced but rather a way to keep it fair for all campers to get an opportunity to experience the site.
  • There are no garbage services at these sites. It is your responsibility to pack out what you pack in. Keep in mind that someone has been at your site before you. If they left the site a mess you’d be upset, so treat your space with respect. One thing that is great to leave behind is the extra firewood you didn’t use. This is always a welcomed surprise for the next camper or RV.
  • Rangers and police do not usually patrol these areas. This doesn’t mean that they are dangerous, it just means you have to be courteous to your neighbours. For example, don’t party until 2 am right beside a family with young children.
You may also like: Why You Need To Care About Sustainable Travel

Recreation Sites (Canada)

Recreation Sites and Trails are a halfway point between completely free off-grid sites and Provincial/State Parks. They usually come with a small fee per night – usually in the $15 – $20 range. Rules are usually more relaxed at these recreation sites but also have fewer amenities than at Provincial Campsites.
Their website is a great resource to find areas that have a lot of campsites. These are nearly all first come first served so we recommend finding areas that have a few Recreation Sites close by – there’s nothing worse than having packed and drove to the site only to find out that it’s full.
When you click on a site that you’re interested in you’ll see all of the important information. Some postings have more information than others, including photos. The cool thing about this is that the driving directions sometimes include information about the vehicle you need to access the site (ie. 2 wheel drive vs 4×4 and if a motorhome or trailer can access).

Provincial Parks (Canada) & State Parks (USA)

These are the sites that you are going to have to pay for. They are typically closer to larger cities and come with more amenities (but not always). We rarely stay at these sites since there are plenty of free ones. Paid campgrounds can range from $15 all the way to over $50 – and that’s without hookups.

In Canada Provincial Parks (and State Parks in the US) will always cost you money. Most people think these are the nicest, and easiest, places to get to but that hasn’t been our experience. However, they are well maintained and supervised by Park Rangers, and usually have showers, RV hookups, Wi-Fi service and flush toilets.

The downside to these sites is that they are strictly regulated. If you bring an extra car or have more than 4 people in a site be prepared to pay extra fees. Pets are required to be on a leash and stay in the designated area; you can’t bring alcohol to the beach, and you have to be quiet by a certain time.

It has been our experience that even with these rules Provincial and State parks are usually louder and more cramped than free sites.

If you are on a road trip or need a place to rest a Walmart or Highway rest stop is a safe place to stay. In our experience, both of these places are welcoming (unless otherwise posted) and allow you to catch up on some sleep. It’s not recommended to stay for longer than you need, or set up lawn chairs, but are a real option if you are desperate. We only ask that you are respectful of everyone around you. If you take over their parking lot the establishment will change their rules, ruining it for everyone.

You may also like: Epic Road Trips: 8 Stops You Need To Make When Traveling Through BC

How to find these spots

Finding your ideal free campsite can be a bit of a challenge if you aren’t familiar with how to do it. There are many different ways of searching for the best sites.

Locals

We talk to everyone we can and ask them their secret spots. Driving an old Volkswagen van draws a lot of attention. People come up to us and strike up conversations nearly every day. You do not need an old van in order to start talking to everyone and getting all the insider secrets of where to go. Listening to the locals is an excellent way to find out the best spots.

The Internet

We try to use this one the least however it is often the most reliable. Spending time on our phone or computer trying to find a site, especially at night, can be a frustrating task. Trying to find a reputable website is not the easiest. Some campgrounds close down, don’t look like the pictures or cost significantly more than they say online. Coupling this with not having a phone plan makes it even more difficult. If you are planning to look online, a simple free campsite website should help you find what you are looking for.

AllStay and FreeRoam app

We saved the best for last! These sites and apps are our secret gold mine and the thing we rely most heavily upon. While the AllStay app isn’t free it will undoubtedly be the best purchase you make for an extended road trip or camping experience (note: this is not a sponsored post, it is just that good!). This is a smartphone app that has proved to be one of the best purchases we’ve made. It works much the same as the Maps app on your phone but shows you every single campsite around you both free and paid.

Just keep in mind that this app is only available through the Apple App Store.

There are lists of search categories to choose from. If you are wanting to opt for free campsites only there is a button that will allow you to filter and view only the free campsites in your area. It has information like toilets, by a creek, elevation, how many sites, fire pits – everything you need to make your decision. It also gives you detailed directions on how to get to the sites. We have found that it is completely worth the $13 which is less than one night’s stay at a paid campground

The FreeRoam app is a free option that has done a great job of compiling many free, and paid campsites. Their app is available for Android and Apple devices and is easy to operate. Many listings through the app will have links to government sites that contain information about the site including how many sites, toilets and even the vehicle you need to access the site. This is an easy-to-use application that even has an option to sort sites by cell signals for all of you digital nomads.

All of the photos in this post have been from free sites. How do you find a campground near you? Let us know, and post your photos, in the comments below.

Like it? Pin it!

How to find a free campsite. #camping #free #campsite #roadtrip #vanlife How to find a free campsite. #camping #free #campsite #roadtrip #vanlife How to find a free campsite. #camping #free #campsite #roadtrip #vanlife How to find a free campsite. #camping #free #campsite #roadtrip #vanlife

So your van is making a loud humming noise and you’re wondering what it is. She’s also having trouble (more than usual) accelerating up hills. It might be time to check your fuel pump and filter.

Tools Needed:

  • Difficulty – 3/5

    Time Needed – 20 minutes

    It goes without saying this is going to be a messy job. No matter how you spin it you are going to get fuel on you, at least from my experience. Wear clothes that you are willing to never wear again. You are going to want to start by gathering all of the equipment you’re going to need. Obviously, once you start you are not going to be able to drive anywhere.

    IMG_2787

    As you may know, we have a 1984 Volkswagen Vanagon. Our particular model has a metal shroud protecting the engine (essentially a metal plate). It’s held on by a dozen or so screws and you won’t be able to do anything with it on.

    Start by clamping. You’re going to have to decide if you want to change both the fuel pump and filter. You’re clamp location is dependent on this. If you’re going to do both, you are going to put a clamp just past the fuel pump closest to the engine, and one on the line on the fuel tank side of the fuel filter.

    Our van has a 10mm bolt that secures the fuel pump to the frame of the van. Remove this and take the pump out of the holder. Once you have your clamps set up it is time to test them. I did this by slowly backing off the clamps for the fuel filter. You will know quickly if your clamps are tight enough. If fuel is not flowing out your clamp is ready. Some books say to start your engine while the clamps are on to use up the fuel in the lines. I have tried with and without doing this – it works way better to use op the fuel. Needless to say, there is going to be extra fuel if you don’t.

    Once you have your clamps set it is a matter of undoing the clasps that secure your pump and filter, removing the old fuel pump and filter and replacing them with the new ones. Please, please, please make sure you look at the little arrow on the fuel pump and filter. It tells you which way the fuel flows. Make sure that the arrow is pointing towards the engine. I’m not sure what happens if you don’t aim it the right way, but it can’t be good.

    So you have the little arrows pointing the right way (towards the engine) and have put the fuel pump and filter back together. The clasps that secure the pump and filter should be snug but not too tight. I test this by tightening them to where I think is good and trying to pull the lines off (not too hard though).

    Now comes the moment of truth. Time to take your clamps off and see if you have any leaks. Same as when you put them on, start with the clamp closest to the fuel tank. Slowly release the clamp while looking for leaks around the newly replaced fuel filter and pump.

    If the fuel holds you are ready to start your van and test your work. Keep in mind that it might take a few cranks to get it working since your fuel pump hasn’t had fuel flowing through it yet.

    Good luck. If you need any help just leave a comment!

All vehicles break down and eventually need repair. This is especially true when you drive a 33 year old Volkswagen van. When you add that most mechanics in Canada and the USA haven’t ever worked on these vehicles, let alone have metric tools, you start to become self-reliant.

Even small jobs like oil changes are unique when the technician goes to open the hood only to find no engine. Larger jobs like changing fuel pumps or electrical issues become more of a challenge and require you to know even more. Rest assured the learning curve is steep but diagnosing, and fixing your car is one of the most rewarding feelings.

We’re not mechanics. Neither of us have any formal automotive training, but what we lack in knowledge we make up with a frugal mindset (read: Cheap), willingness to learn, and we don’t go anywhere if we don’t fix it.

Our first day on the road was full of thousands of emotions. At night time, we couldn’t wait to sleep. We took an exit on the highway, drove down the street and almost instantly

img_2141
Our first camping spot

found a small dirt road to pull off and rest our heads. Five months later we have slept everywhere from beside hot springs and the ocean, in the forest, Walmart parking lots, to residential streets. Surprisingly, sleeping anywhere and everywhere has been one of the easiest transitions for us. With only paying for three nights in over
five months, we quickly learned we can fall asleep just about anywhere. That is something very important with this lifestyle. While, obviously, we prefer the nights where we wake up with an amazing view in reality that isn’t always the way it happens.

When we started this trip we had an idea of what it was going to be like. As much as we tried to do this without expectation and without any planning, nature set in and we couldn’t help but dream about our freedom. But, as always, reality is different. When we started this life, we were much like children at recess, running in circles basking in our new found freedom. We are now more like children after school – still running around hyped on sugar, but we know we have a little more time than the 15 minutes now.

In two months of Vanlife we have only paid to sleep once (I am writing this from an air-conditioned room in Saint Catharines, Ontario). We have slept everywhere from the mountains outside Lillooet to a department store’s parking lot in Wisconsin.

DSC_0528

Six months ago Myles and I were sitting in our basement suite both injured and both extremely unhappy. Our injuries, although very different from one another, left us feeling in very similar ways. We were too young to feel like this, we felt bed ridden. Blinded with self pity we hardly ventured outside, we barely did anything. With no plans for a future, we certainly didn’t think anything positive.

In the past two months, we have traveled across five provinces and driven through eight states. Seen everything from frogs and vultures to bear cubs and elk, climbed up mountains, swam in lakes and got lost in the forests (more times than we care to admit). We’ve been euphoric, humbled, even scared. We have stopped in the most incredible cities, and some we wish we didn’t (a wrong turn just before getting into Colorado combined with a car that wouldn’t run turned a lot of heads and left us more than a little nervous). We’ve broken Gurt, and then fixed her more times than we can count.

Well, we have driven over all the mountains, passed through all the wheat fields and have hit the land of forests and lakes. Finally, a land that we like and Gurt does too. Myles has driven across Canada before (well to Toronto) so in an effort to increDSC_0831 (2) ase his experiences we decided to head south and scout out some American wildlife.

With more small towns, we have found America to have more “unclaimed land” (crown land but I don’t know what they call that in America, Spangle land? I don’t know..) This works well for us, as it is much easier to find somewhere to camp and we are making great efforts to avoid paying for a campsite. Minnesota is the land of beautiful waterfalls, monstrous lakes that look more like oceans, and hunters. Lots and lots of hunters. Me, being the newly found vegetarian and animal lover that I am, am not impressed with this deer-killing society. Myles and I have actually gone to sleep with the soft, calming sound of gunfire – a little concerning what people are shooting in the middle of the night, but anyhow.